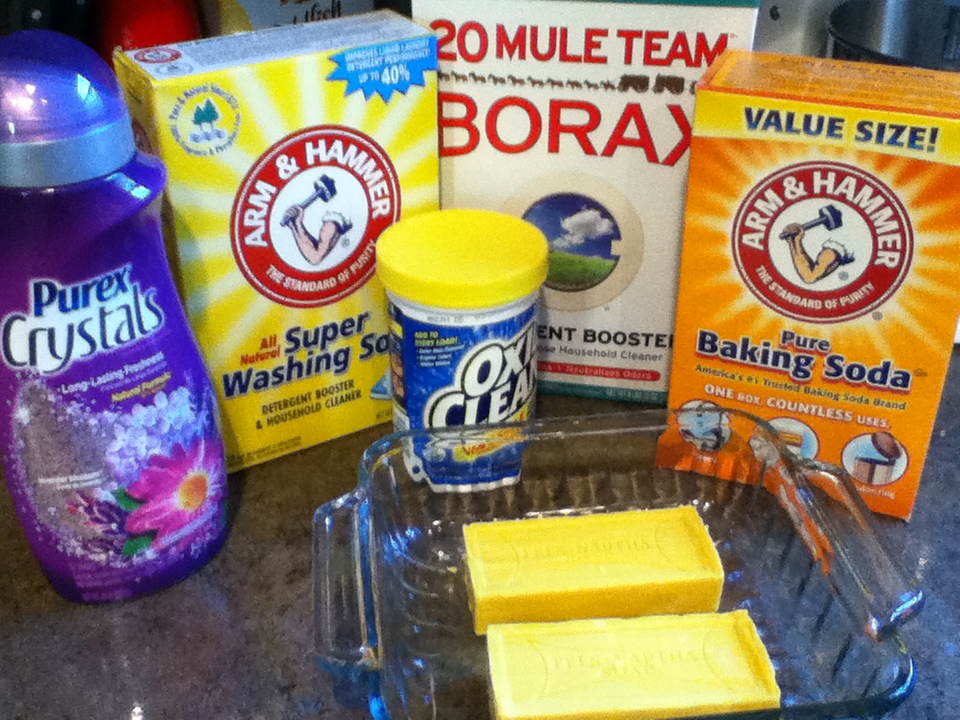
So the lack of blog has not been due to sheer laziness. This time. I've actually been working my not-so-little butt off getting back to the basic ingredients of all things. It started with laundry detergent. I've noticed a bevy of homemade laundry soap recipes floating around on Pinterest. All claimed to create enough laundry detergent to last a year for under $20. Considering that I do many many manymanymany loads of laundry a week and the detergent you buy at the grocery store is not only expensive, but mostly comprised of water, I was game to give it a shot. I researched all the recipes I could Google. Many were made up of three basic ingredients: Borax, Fels Naptha (or Zote) and A&H Washing Soda. I found a few without the Borax and some that had added ingredients like A&H Baking Soda or OxyClean. I decided to go with one of these beefed up recipes as I don't always have time to pretreat. It
is rather hard to use a pretreater when you have a baby on your hip trying to snatch your glasses and a preschooler pulling your leg toward the fridge in an effort to get juice "
now, mommy!" I recalled seeing a
blog post on Power Wallet on just such a recipe. It just happened to have been written by a trusted friend, so I decided to give it a try. I had a hard time finding all the ingredients in one store. The grocery and big box retailers down here are downsized from there regular metro and suburban area versions. At long last I gathered everything together. I did have a bit of pause in regards to the Borax due to a family history of issues with the powder, so I made a small batch first. If it makes any of us itchy, I will replace it with something else for the big batch, but that will take some more research. I've done three loads of laundry with the new soap so far. It smells amazing; fresh and clean. We haven't had any weird breakouts or itchy spells but I'll reserve final judgement until the small batch is gone.
A funny note about grating the Fels; I did it on a night we were making tacos so made sure to put it up high when I was done. Wouldn't want any unfortunate cheese/soap mix ups, would we?


With the laundry detergent all taken care of, I decided that we needed to tackle the dryer. I love the convenience of a dryer bar but they never, ever last as long as the package indicates. I bet the model they are employing for length of use is a bachelor who determines cleanliness with the ole sniff test. It certainly isn't determined by a family of four. I remembered a post in a group by a friend who I will call Mom of So and So. MoSoSo (for short) had mentioned wool balls as a gentle way to dry cloth diapers and as a general fabric softener. I looked them up on Amazon. They weren't terribly expensive but there wasn't much to them either. So I leaned into Google once more and found a
tutorial for making your own. It's really easy. I'll only add one bit of missing information: to achieve 4 balls from one skein, they should be roughly tennis ball sized. I haven't finished them yet, but I'll update the blog when I have results. I'm also going to try my hand at homemade essential oils. Have you seen the price of those suckers? I'd like to use some for the dryer balls and will also use it when I make candles. (I have sooooo downed the kool aid on homemade items!)


The next few crafty happenings were inspired by the boys. The first was a solution to a mommy aversion. I HATE the smell of Play Doh. It stinks to high heaven. I didn't want to deny my kid the chance to play with something of the sort, though. Say it with me now: "Google to the rescue!" I found a
very easy tutorial and whipped it out in a half hour, post baby bedtime. The results were pretty and smelled lightly of bread. It was elastic-y in my hand without being sticky. I used regular food coloring. I know there are natural color recipes but they are pretty time consuming and rather messy to create. Alex came down with the flu the morning after I made these. I'm saving them in ziplocks until he feels better so they don't become balls of Plague Doh instead.

Riding the high of inspiration, I pulled out the flannel I was going to use to make jammie bottoms for the boys. Since the fabric's purchase we've accumulated plenty of pajamas for both kids, so I decided to use it for pillowcases. I had Toy Story for Alex and a cute car print for Ethan. This isn't about the pillowcases though. Anyone with a sewing machine and the ability to stitch straight can make one. It just so happens that I decided to make Alex's while he was playing with his favorite toys: A recycle truck and it's accompanying trash cans. So with the scraps, I cut a rectangle. Then flipped over 1/4" on each long side and zipped it through the machine.
Wrong sides facing and with a good stitch anchor on each end, I sewed together the short sides.


The final installment in my mad craft mayhem was for my own sanity. Now that Eboo is a bit bigger, I'm able to actually keep the house somewhat clean. Somewhat. I was therefore getting tired of seeing the boys' room a complete and utter disaster area every single night when putting them to bed. I had to do something to make it easier for Alex to help me clean up at the end of a hard day of playing. It was time for labels. What to do when your kid can't read? You make pictures! I took a piece of white printer paper and placed it on the table under the dining room light. Then, for each bin to be represented, I took a few toys and arranged them on the paper. I took a shot with my iPod touch and waited for the Cloud to do it's business. *BING!* They showed up like magic in iPhoto (yes, I know, I'm a bit obnoxious in my love of all things Apple). I dragged one over to Pages and named it in a text box. I then printed the label on a piece of 4x6 photo paper. I repeated this for every photo, using the first as a template and dragging each subsequent photo over the previous. Change the words, print, repeat. Slap them on the bins with a couple strips of packing tape. It came out pretty nicely, I think.


Following this same idea, I made the boys a "parking lot" for the amazing amount of trucks we have.
It's been a productive month for only being 8 days in. Not too shabby, Oddess, not too shabby.